In traditional-network world, you could secure your application by placing every tier of your tiered application in a separate VLAN, and apply firewall rules between every tier and the other, and also between the whole tiers and the outside wold. However, your app isn’t fully secure, what if one of the tier members got infected, and started to spread the infection and compromise that tier where it resides. With VMware NSX micro-segmentation, you could set firewall rules between all of your VMs.
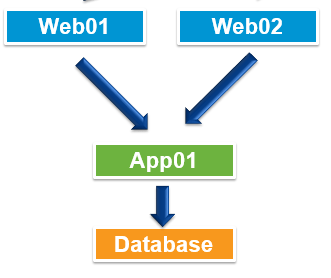
There are many methods and workarounds to set firewall rules between app-tier VM members, but in this article I will be demonstrating the shortest path to achieve this. The DFW has an option called “Negate Source/Destination”, by enabling this option on the firewall rule you will be able to isolate the tier members, and also allow traffic coming from any other sources. For instance, if you have a 3-tier web application, end-users will be able to reach this app, but the web servers – which receive requests from end-users – will be isolated from each other.
In this article, I will be demonstrating a web-server-tier, comprised of two web servers.
Watch this video for the steps and details. The video language is Arabic , For non-english speakers, go through the article please.
Steps:
1- Login to your vSphere web client, and go to the NSX console.
2- we will be leveraging “security tags” in this example. Go to “Groups and Tags” >> “Security Tags” tab >> Add.

3- give the tag a name, description (optional), and then click “Add”.

4- Now, you need to assign this tag to VMs. Select the security tag you’ve just created, and thin click on “Assign VM”.

5- Select the desired VMs, add them to the tag, and then click “OK”.

6- Create a security group. A security group will be needed for the firewall rule. From the same pane, click on “Security Groups” tab, and then click “Add”.

7- specify a name and description for the group, then click on the third node from the left navigation pane, specify the object type as “Security Tag“, select the tag from the list, add it to the group, and thin click “Finish”.

To verify your configuration, go and check the security tags and security groups at the summary tab of one of the candidate VMs.

8- Now, let’s create a DFW ruke. got again to NSX console (Networking & Security), and create a firewall rule, and give it a name.
Note: this technique will not work if you have no implicit deny rule. You need to define a “Deny all” rule at the very bottom of the DFW rules. See below.

9- set the security group you’ve created as the source and destination for this firewall rule, and set the “Negate Source” option to “On” only for the source of the rule.

10- publish the changes, and don;t forget to set the very last rule to “Block”.

By examining the communication between the two VMs I have in my lab, the connection has been blocked between each other.


11- Now, as a user, try from your computer the connection to these web servers. In my case I call the load balancer IP address (as they sit behind a load balancer), and it works!

I hope this’s been informative.
Thanks,
